Friday, December 11, 2009

Stampin' Up! Sale


Stampin' Up! is having a huge 12 days of holiday sales from now until December 22nd. The products that are on sale are fantastic and are all Big Shot related. Please click here to go to my store to shop for these amazing products online

Thursday, December 10, 2009

329- Wrapped Gift Card


When I saw this week's layout challenge I was trying to think of a way to make it and somehow this card came to be. I don't think it still fulfills the criteria of the original challenge but I'm happy with the finished product

Recipe:

Stamps: Short and Sweet

Paper: Bravo Burgundy, Brushed Gold

Ink: Bravo Burgundy

Accessories: 5/8" Bravo Burgundy grosgrain ribbon, scallop oval punch, large oval punch

Click here to shop for these products 24/7

BTW- STAY TUNED FOR A HUGE SALE STARTING TOMORROW!!!!

Wednesday, December 9, 2009

328- Tuxedo Tree Card


This layout was from the splitcoast layout challenge last week (SC257). I decided I wanted to just keep this card clean and simple with black and white and just some dazzling diamonds on the trees. It was SOOO hard for me to not use embellishments and corner punches but I really do like the tuxedo look. Plus the background is all dry embossed which adds enough wow to the card.

Recipe:

Stamps: Lovely as a tree

Paper: Whisper White, Basic Black

Ink: Basic Black

Accessories: Big shot, texturz plate, dazzling diamonds, 1 1/4" square punch

Click here to shop online 24/7 for these amazing Stampin' Up! products

Monday, December 7, 2009

327- Santa Snowglobe Card


I have seen a few snowglobe cards and was inspired to make my own. I love the finished product- he is ridiculously cute.

I used tombow to adhere the chunky glitter around the globe. I also embossed the santa because it makes it easier to colour it in.

Recipe:

Stamps: Jolliest Time of the Year, Fundamental Phrases

Paper: Basic Black, Whisper White, Real Red Textured Paper

Ink: Real red, Basic Black

Accessories: Black embossing, word window punch, modern label punch, photo corners punch, coluzzle, chunky essentials

Click here to shop for these amazing products in my online store

Sunday, December 6, 2009

326- Teal Noel Card


I really wanted to do a bright and happy Christmas card and I thought teal would be the perfect colour. I just kept it simple and clean bold and bright. Love it!

I used clear embossing with my stamp-a-ma-jig to make the main image shiny.

I CANNOT stop making gate fold cards this way- it's so much fun! Cut your paper down vertically so you get two pieces that are 4 1/4" x 11". Score the paper at 2 3/4" on each side to get this opening

Recipe:

Stamps: Big on Christmas

Paper: Taken with Teal, Whisper White, Holiday Lounge DSP

Ink: Taken with teal

Accessories: Clear embossing

Click here to shop for these amazing products in my online store

Saturday, December 5, 2009

325- Holly Jolly Christmas Card


I just love the mojo monday sketch challenges- I always think that trying to figure out a layout is the hardest part. When I saw this layout I knew I wanted to use my scallop circle die. I also wanted to use this DSP because I adore this holiday treasures paper- it's so much fun!

On the main image I used a few scattered dazzling diamonds just to give it a bit of shine. I also sponged around the edges just to soften it.

I was super excited to use the buttons- I never ever use them and am always looking for an opportunity to break them out. To adhere them I use the crystal effects- I think it works the best.

Recipe:

Stamps: A Holly Jolly Christmas

Paper: Old Olive, Ruby Red, Whisper White, Holiday Treasures DSP

Ink: Old Olive, Ruby Red

Accessories: Big shot, coluzzle, riding hood red buttons, dazzling diamonds, crystal effects, corner rounder, scallop circle #2 die

Click here to shop for these fantastic stamping products

Friday, December 4, 2009

Craft Show this Saturday!

I will have a table tomorrow, Saturday December 5th from 9am until 5pm at Praise Cathedral Worship Centre in Meadowvale. If you are in Mississauga or the GTA tomorrow please stop by! The address is 6785 Millcreek Drive.

As always if you stop by I will have a special treat for me- just tell me you are a blog reader!

Retiring Stamp Sets


Stampin' Up! is retiring all of these dormant stamp sets on 2010-Jan-04. I a definitely going to miss quite a few of them- I adore For the Bride and Grande Soiree!! Click here to see these amazing sets online.

If you order these through me I will give you 10% off of them. Email me with your orders at mcgill15@hotmail.com

Item Number Stamp Set
113407 Back Woods
114492 Beautiful Baby
114486 Birthday Wish
113200 Branch Out
114496 Celebrations
113732 Central Park
113206 Classic Sketches
113226 Classy & Fabulous
114498 Flowers in Silhouette
113405 Font of You
113216 For the Bride
114494 Forever
109425 Friend by Definition
114488 Fun Flowers
113716 Garden Greetings
114490 Glad Friends
111580 Grand Soiree
113242 Hit the Road
113710 Lexicon of Leaves
113236 Man's Best Friend
114423 Ocean Commotion
113728 Playful Petals
109276 Polka Dot
111544 Putt Putt
113240 Quilt Quips
113754 Really Retro
113403 Sip by Sip
113726 Sweet Stems
113250 That's Funny
113688 Wonderful Watercolors
114028 Para la novia
114032 Acuarelas Maravillosas

Thursday, December 3, 2009

324- Gold Gift Card Holder


border="0" alt=""id="BLOGGER_PHOTO_ID_5410846333105826658" />
I have been wanting to make one of these gift card holder cards for a while. I just wanted to keep it simple for the holidays and make it as shiny as possible! Seriously- it is all about the bling! (is that word still being used?)

It was also my first time using the printed window sheets. They are just fantastic and add such a nice background. To adhere to the cardstock I used the glue dots where there were snowflakes so it could be hidden- if you use a glue runner you would be able to see it.

To make this you cut your cardstock vertically so you get a piece that is 4 1/2" x 11". You then score at 3" on each side and 5 1/2" in the middle. Use sticky strip to hold the card together. You then cut a slot on the inside for the gift card to fit in- I also used punches so it's easier to take the card out.

Recipe:

Stamps: Heritage Holidays

Paper: Brushed Gold, Whisper White

Accessories: Gold embossing, 1 3/8" circle punch, scallop circle punch, Snowflake Printed Window sheet, glue dots, word window punch

Click here to shop for these beautiful products 24/7

Wednesday, December 2, 2009

323- Medallion Card


I have seen so many fantastic cards using this stamp and I am still playing with it. As soon as I saw this colour challenge on splitcoast (CC247) I knew I wanted to use the stamp. I decided to go with a square card so that the image was symmetrical on the paper. I was going to put a sentiment on it but I really liked it as a blank card.

Recipe:

Stamps: Medallion

Paper: Very Vanilla, Soft Suede, Basic Black

Accessories: Black and gold embossing, brad punch, vintage and gold brads, 1 3/4" circle punch, ticket corner punch

Click here to shop online 24/7 for these amazing products

Tuesday, December 1, 2009

Greece Scrapbook- Delos


I have got to get this scrapbook by the end of the month so it's crunch time. As you can see by the pics at the top I had a layout and background. But my problem is I just can't seem to cut down on the pictures. I wish I could just pick 3 to do an amazing background but I love them so much! I have a goal of a page a day so I can give it as a Christmas gift- I have a feeling the coming pages won't be elaborate!

Monday, November 30, 2009

322- Ornament Gate Fold Card


This is a very simple card using the delightful decorations set, ornament punch and gate fold technique. It is a great card if you need to make a lot of Christmas cards because you can make it really fast and it's a fun fold.

This is a different gate fold than I have ever used- usually they are vertical cards but this time I made it a horizontal gate fold. I really like it- I will use this layout again soon I think.

When I was first designing this card I was actually going to use more paper to add 2 layers behind the ornaments but in the end I decided to keep it simple. It is actually harder for me to keep the card simple- I always want to add more. But I was inspired by so many of my friends who enjoy simpler cards and just left this alone. And I'm really happy I did- I think the finished product is nice and clean looking.

Recipe:

Stamps: Delightful Decorations

Paper: Chocolate Chip, Old Olive, Whisper White, Holiday Treasures DSP

Ink: Old Olive, Ruby Red

Accessories: Ornament Punch

Click here to shop for these amazing products online

Sunday, November 29, 2009

321- Jolly Tree Card


I am trying to use up my holiday DSP from last year before I open up this year's pack. I love the finished product- it just screams Christmas! This layout is from the Mojo Monday challenge this week (MOJO114).

I didn't have any ruby red ribbon but riding hood red was very similar and I still had some of this taffeta ribbon left- I definitely think the colours went together well and it looked seamless.

I have been doing craft fairs recently and have learned that most people enjoy traditional holiday colours (I'm not one of them). That was the inspiration for this card and the next few that I will be posting- I'm trying to go back to basics.

On the image I added dazzling diamonds on the "snow" to add some shine and I lit up the balls on the tree with crystal effects.

Recipe:

Stamps: Jolliest Time of the Year

Paper: Holiday Treasures DSP, Whisper white. Old Olive

Ink: Old Olive, Ruby Red, Chocolate Chip

Accessories: 1/4" riding hood red taffeta ribbon, dazzling diamonds, scallop edge punch, crystal effects

Click here to shop for these products online

Saturday, November 28, 2009

320- Happy Holidays


This was a difficult challenge for me because I wanted to use it in a Christmas card. In the end I do like the card- I wouldn't necessarily use the shimmer paint again but I was trying to find a way to bring some shine to the card. However, you can't see the pink snowflakes that I rolled onto the whisper white anymore- they are very faint. Next time I would probably use Dazzling Diamonds

Recipe:

Stamps: Big on Christmas, Bold Snowflakes wheel

Paper: Whisper White, Bermuda Bay, Old Olive, Pretty in Pink

Ink: Bermuda Bay, Old Olive

Accessories: Frosty white shimmer paint, crystal effects, tag corner punch, big shot, petals a plenty embossing folder

Click here to look at these products in my online store

Thursday, November 26, 2009

Open House This Sunday!

I will be holding an Open House on Sunday, November 29th from 1-5pm. If you are in Mississauga or the GTA please stop by anytime to make a fun project and enjoy some holiday treats- be ready to stamp and have fun with all the tools in my stamping room. There will be prizes and lots of other fun surprises!

Please RSVP by Friday, November 27th.

Wednesday, November 25, 2009

Holiday Extravaganza Sale!!!


For the second year in a row Stampin' Up! is having a Holiday Extravaganza sale!!! There are package deals and also up to 50% off certain items like embellishments and punches- how fantastic is that?!

The sale will last for one week- please make sure to place your orders before midnight on November 30th. You can order directly through me or if you live in Canada you can order online in my store 24/7 at the link below

http://www.stampinup.com/ECWeb/CategoryPage.aspx?categoryID=462

Last year these bundles and items sold out quickly so make sure to get your order in as soon as possible!

319- Accordion Card


I was asked to make up an accordion card for a woman who is opening a kennel. It was made on coasters to keep it sturdy and opens up and she can put pictures inside it.

Recipe:

Stamp Set: Schoolbook serif alphabet

Paper: Holiday Treasures DSP, Soft Suede, Chocolate Chip

Ink: Chocolate Chip

Accessories: 1/2" soft suede ribbon, coasters

Tuesday, November 24, 2009

318- Christmas Trees


This was one of my first attempts at blank embossing for a splitcoast technique challenge (http://www.splitcoaststampers.com/forums/showthread.php?t=466417). I wanted to make a two tone card with some shine and I think I accomplished that. I definitely need to practice more to get a perfect blank embossed card- I need a thicker blocker.

I first gold embossed the sentiment- I'm not sure if it would look as good if I dry embossed the paper then tried to put on the sentiment. It might get bumpy and jagged but I've never tried it.

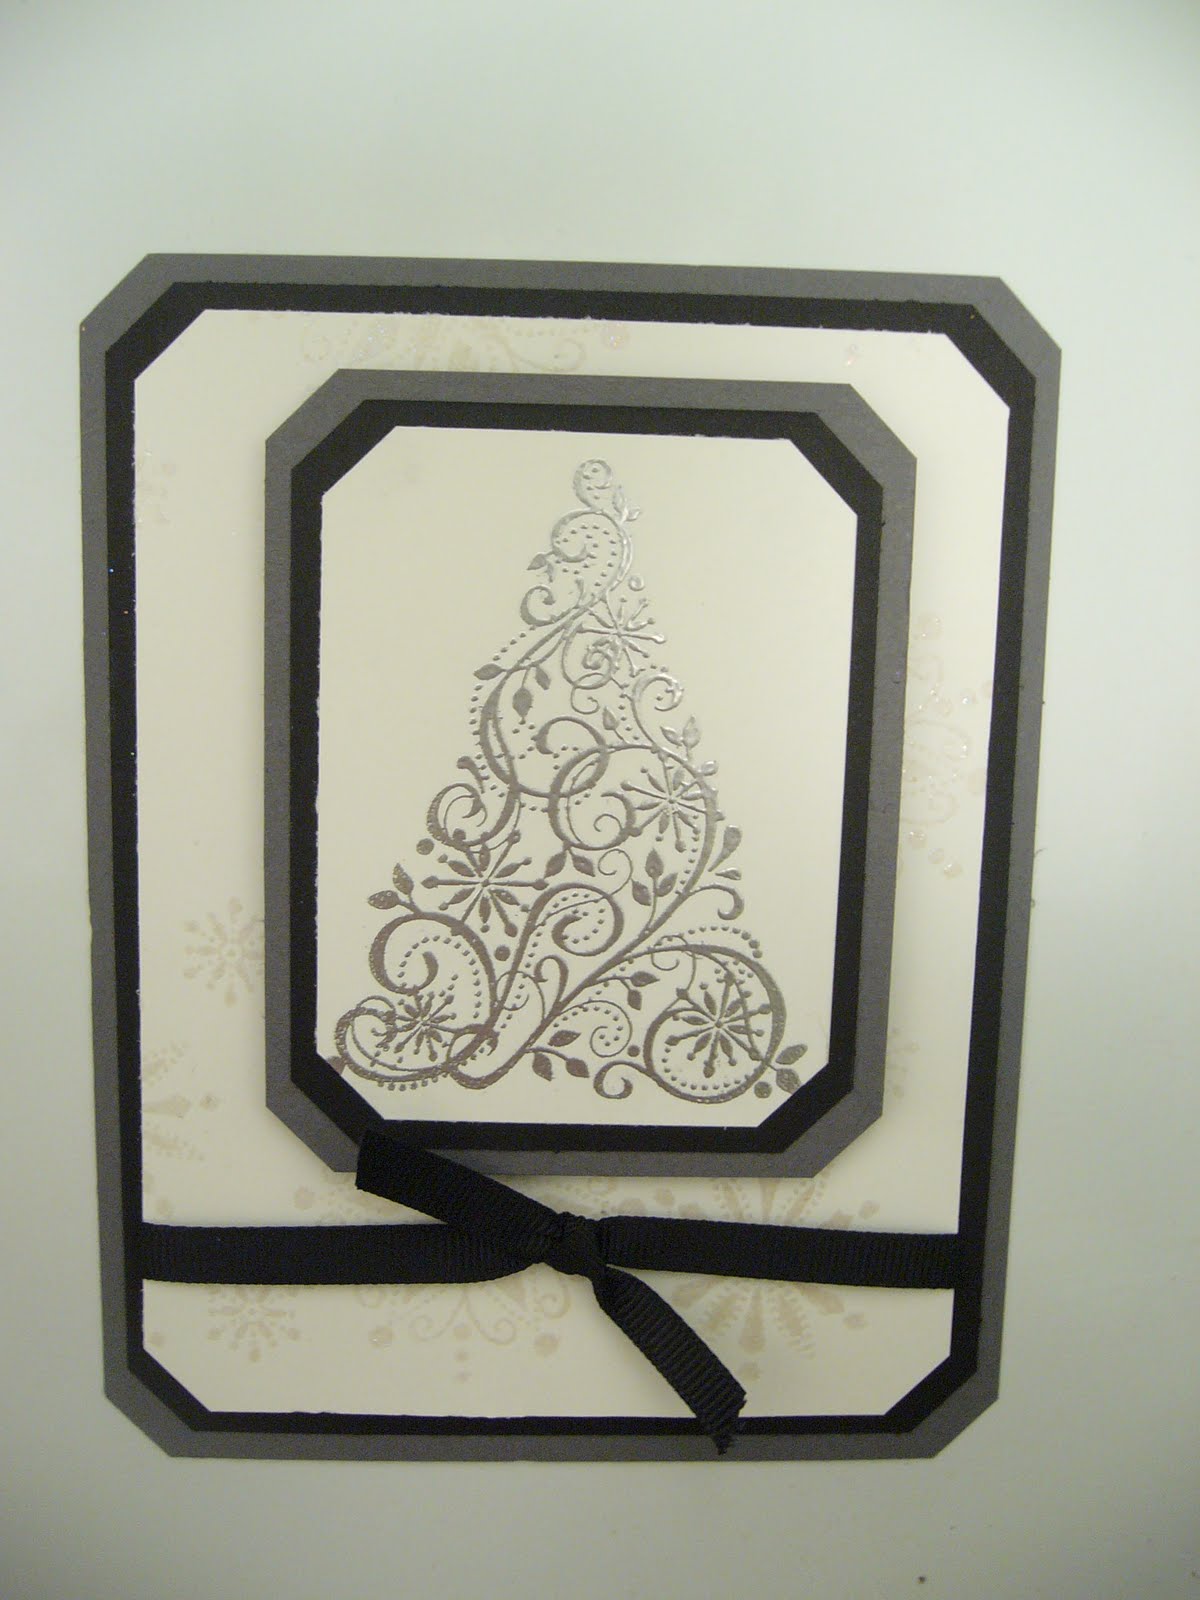
I used my coluzzle to cut an oval in a coaster- thicker than cardstock but thinner than chipboard. I used the masking technique on the very vanilla to stamp the trees in the oval. I then used dotto on my oval and put it on top of the masked image and ran it through my big shot in the plenty of petals embossing folder. If all had worked out well the area under the oval should have stayed smooth and the area around it would have been embossed. Well as you can see that didn't really happen- those folders just really give a deep impression!!

I left the oval on and brayered Handsome Hunter over the dry embossed area- it's a great way to colour the image you've embossed. I ended up using my frost white shimmer paint on the centres of the flowers but I knew I needed to still pop out my central oval. So I used the shimmer paint to colour in the whole oval. I have to say this is motivating me to buy the champagne shimmer paint but I used what I have

So I tried it again a second time- this time I still used an oval out of the coaster but I put one on the front and on the back. I definitely got a better window this time but there is still the faint impression. I think next time I'm going to have to suck it up and use my chipboard to do this.

I need your opinions- do you like it better when I use the shimmer paint in the oval or can it stand alone? Let me know!!

Recipe:

Stamps: Lovely as a Tree, Snow Swirled

Paper: Handsome Hunter, Very Vanilla

Ink: Handsome Hunter

Accessories: Petals a Plenty, Big Shot, Coluzzle, Gold Embossing, frost white shimmer paint, brayer

Click here to buy any of these fantastic products online 24/7

317- Square Santa Card


This card was definitely inspired and cased from this card by Mary Fish at stampinpretty.com

As soon as I saw it I thought it was just so pretty with the black and white. I knew I wanted to do my own interpretation as a Christmas card

Recipe:

Stamps: A Holly Jolly Christmas, Fundamental Phrases

Paper: Basic Black, Whisper White, Real Red textured paper

Ink: Basic Black

Accessories: Black embossing, 1 1/4" and 1 3/8" square punches, word window punch, modern label punch, brad punch, vintage brads, 1/4" basic black grosgrain ribbon

Click here to order these fantastic products online 24/7

Monday, November 23, 2009

316- Hanukkah Card


I did a children's event at the Chabad Jewish Discovery Centre here in Mississauga where we made Hanukkah cards. Here is the one that I made that is a bit more whimsical than the other one I designed.

This stamp is one that you can buy individually from the mini occasions catalogue- it's a great way to get a stamp one occasion.

Recipe:

Stamp Set: Let there be Light

Paper: Whisper White, Bashful Blue, Bashful Blue DSP

Ink: Bashful Blue

Accessories: Whimsy Wheel, Corner rounder, 1/4" bashful blue grosgrain ribbon, dazzling diamonds

Click here to buy this great stamp online 24/7 on my Stampin' Up! website

Sunday, November 22, 2009

I'm Back!


Hi everyone- sorry that I haven't posted in a while. As a lot of you know I was off for a few weeks due to an accident but my physio told me that the best way to exercise my arm is to stamp so...I'm back!! I have been getting back into it this weekend so I hope to get back to posting everyday!

I did a craft sale yesterday and made quite a few projects. This a gift tag box that i made- quick and easy and a great hostess gift for the holidays.

The tags were made using punches and the Deer Friends set from last year- I know it's retired but I adore it. Making tags is a great way to use up retired scraps- I got to use up my Pacific Point with these. And you just use a brad punch and elastic cord to finish them off.

The boxes are soooo easy- you just need some paper and your scoring blade. Decide what size item you are putting in your box- aka gift tags or cards. Add 1/4" to make some rude and 1" for each side. You then cut two pieces that are the same size. Score the first piece at 1" on each side. Score the second at 7/8" so that it is a bit bigger- this is so the lid can fit on top. Decorate the lid then use sticky strip to assemble the box. Quick and easy!

Recipe:

Stamp sets: Deer Friends, A Holly Jolly Christmas (for the To/From on the back)

Paper: Whisper White, Pacific Point, Crushed Curry, Pacific Point DSP

Ink: Pacific Point

Accessories: Brad punch, gold elastic cord, 1 1/4" and 1 3/8" circle punches, scallop punch, sticky strip, dazzling diamonds

Wednesday, November 18, 2009

Craft Show this Saturday!


Time for another craft show! This Saturday from 9-4pm I will be at Thomas Street Middle School in Mississauga selling my cards and demonstrating a fantastic Christmas card. As always if you stop by my table I will have a special treat for you. The address is:

2640 Thomas Street in Mississauga off Erin Mills Parkway

Sunday, November 8, 2009

315- Medallion Bell Card


I am continuing with my nontraditional Christmas cards. I combined two splitcoast challenges to make this card- colour challenge CC242 and the sketch challenge SC253.

It's hard to see but both the back piece of Melon Mambo and the Kraft cardstock were run though the big shot on a texture plate to give them a damask embossed image.

Recipe:

Stamps: Medallion, Heritage Holiday

Paper: Basic Black, Melon Mambo, Kraft

Ink: Basic Black

Accessories: Gold embossing, big shot, texture plate, brad punch, gold brads, 1 3/4" and 1 3/8" circle punches

Click here to shop in my online store 24/7 for these amazing Stampin' Up! products

Saturday, November 7, 2009

Thank You!

A special thank you to everyone who visited my table today at the White Oaks Craft Fair- I had an amazing time meeting so many fantastic new people! I hope that you can all make it to my Holiday Open House on Sunday, November 29th from 1-5pm.

Special thanks to my Aunt Connie who stopped by to help me out and was such a great advocate of my cards!

Thursday, November 5, 2009

314- Joy Ornament Card


This is a card that I designed for a craft show in Oakville ON- anyone who comes by my table will be able to make it. I hope they like it! If you in the area please stop by White Oaks Secondary School to make one yourself!

Recipe:

Stamps: Delightful Decorations, Sassy Sparkles Wheel, A Holly Jolly Christmas

Paper: Night of Navy, Whisper White, Rose Red

Ink: Night of Navy, Silver, Rose Red

Accessories: Petals a Plenty Impressions Folder, Scallop Oval punch, Large Oval Punch


Click here to order these amazing products from my online store 24/7

Wednesday, November 4, 2009

Order A Set of Cards


You can stock up on cards for the year at any time For $30 I will send you 10 assorted cards with envelopes. Once I receive payment I will email you to find out which cards you would like- they can all be the same or it can be a mixture. I can also do custom orders- it is entirely up to you.


Sunday, November 1, 2009

Craftapalooza 09


This is a craft fair that I am participating in on Saturday in Oakville- click here for the directions. I will be at table 31- please stop by and say hello! If you mention that you saw this on my blog I will give you a special treat for visiting me!

Thursday, October 29, 2009

Beautiful Megameeting Card


Here is another one of the beautiful cards that was designed by Laura Robinson for megameeting. This was by far my favorite card that we did- I mean look at the colours! This colour combination is absolutely fantastic- I would have never thought to have done it but I just adore it!

Recipe:

Stamp Set: Backgrounds, Baroque, Priceless, Simply Said, Short and Sweet

Paper: Rich Razzleberry, Elegant Eggplant, Crushed Curry, Old Olive

Ink: Rich Razzleberry, Crushed Curry, Old Olive

Accessories: 1 3/8" and 1/2" circle punch, crimper, scallop circle punch, brads, brad punch, word window

Click here to shop in my online store

Megameeting Card


Here is another one of the amazing cards that was designed by Laura Robinson for megameeting. I have to say I adore any cards that involve Christmas ornaments- they are just so easy and simple to make and very effective. All you need to do is circle punch some images, layer and add a dimensional- voila! Fantastic Christmas card!

Recipe:

Stamp Set: Berry Christmas

Paper: Whisper white, Basic Black, Brilliant Blue

Ink: Basic Black, Brilliant Blue

Accessories: 1 1/4" and 1 3/8" circle punch, scallop edge punch

Click here to shop in my online store