Wednesday, April 29, 2009

230- Pop Can Card


I wanted to use different materials in my big shot class and wanted to play with some metals. When I was at Regionals Shannon from Stampin Up said that her inspiration was Diet Coke cans and this got me thinking. I have tons of Coke Zero cans- why not try something with those!? So I cut up some cans and used my sizzlits and made this card. I'm really happy with the end product and will definitely try this again.

I used the new Walk in the Park Designer Series Paper from the Occasions catalogue for the card and just love the colour combo. If you are interested in ordering this paper online please click here. Stampin' Up! is currently offering a promotion involving the Occasions catalogue- for every $50 that you spend on items in this catalogue you can choose one free product from pg. 208 in the Spring/Summer catalogue. How great is that?! You still have 3 days to take advantage of this offer- please let me know if you are interested

The shape of the card was inspired by a card in the new Stampin Success. Score your card at 5 1/2" and at 6 1/4" to do this fold. Fold the card at the the 5 1/2" mark and then open the card at the 6 1/2" score line. Seal the end using the eyelets and decorate with the ribbon. I love the finished product!

The aluminum goes through the big shot with no problems but your image may stick on the die. I HIGHLY recommend using tweezers when dealing with your cut-out- the aluminum can be sharp. When adhering the aluminum I used crystal effects because I wanted a tackier adhesive.

Recipe:

Paper: Basic Grey, Walk in the Park DSP, cameo coral, baha breeze

Accessories: Big shot, sizzlits join in the cheer strip die, birds and blooms, cropodile, 1/4" whisper white grosgrain ribbon, jumbo pewter eyelets, pop cans, crystal effects

Tuesday, April 28, 2009

229- Wedding Cake Pop-Up


Here is a card I made for my Big Shot class last night- my first pop-up card!! So exciting! Ever since I saw these dies I knew I needed to play with them!

This was my first card using the new Pop-Up dies and let me tell you- so much fun!! It is a 6" x 6" card because it has the Pop-Up cake inside of it. I based this card on the Tiffany box with the blue and white. I wanted to keep the outside elegant and simple because the main focus is the inside. I also tied the ribbon around the card to hold it closed.

Recipe:

Stamps: For the bride

Paper: Whisper white, tempting turquoise

Accessories: Big shot, texturz plate, corner rounder, Pop-Up Cake die, white embossing, white organza ribbon

Click here to order this beautiful wedding set. If you are interested in purchasing one of these fabulous pop-up dies please click here to order it online

Monday, April 27, 2009

How Amazing Is This!?


My downline Marni Shelson is a teacher at a local elementary school. She sent Stampin' Up! an email asking if they could send her supplies to start a stamp club at her school and look what they sent her!! HOW AMAZING IS THIS!!! I have known for quite a while that I am involved with an amazing company and this just proves it! They sent all of these retired products plus ink all as a donation- it's just fantastic!

Sunday, April 26, 2009

Cheers To You Class Planner


Here it is- my first class planner for demonstrators!! I am so excited to launch this- I will be doing one of these every month from this point forward. These planners are designed to help demonstrators plan classes involving a Stampin' Up! stamp set and perhaps another featured project. You will get all of the instructions and designs necessary to complete and demonstrate the fantastic projects.

This first class planner involves 5 different styles of invitations using stamps from the Cheers to You set and the Pink Flamingo Designer Series paper. Your customers will leave with the stamp set and the 5 great projects.

The planner involves step by step instructions to make these cards including over 40 colour photos. It also outlines all of the products that you will need to make the projects and suggested class prices. I also give lots of tips and upselling ideas.

The cost of this class planner is $15 Canadian and it can be sold internationally. Once I receive the payment I will email you the PDF of the planner.


Friday, April 24, 2009

228- Never Ending Card


View 1

View 2

It took me a while to figure out what I would use to do the never ending card technique challenge (TLC214). I made this card for a member of my downline for her promotion to senior associate. I just wanted to use the different papers from Urban Garden and to stick within that colour palette. The instructions for the card are here- I highly recommend watching the video because it shows you how to do all the folds. It is really just 4 pieces of 3"X6" that are scored and folded a certain way- it isn't hard once you get started. I love the finished product- I just like playing with it!

Recipe:

Stamps: Congrats

Paper: Baha breeze, urban garden DSP, kiwi kiss, night of navy

Ink: Night of navy

Accessories: Sticky Strip

View 3

View 4

Sunday, April 19, 2009

Tip of the Week


I recently purchased the adhesive remover and I was a bit skeptical at first- I wasn't really sure if it would work. And let me tell you- it really is great. Sometimes you can get little black marks from snail or the two-way glue pen on your card and you just can't remove them. This tool will remove them to help clean off your card- it's fantastic! The only thing is you have to use it very lightly- if you are too rough it can bend the cardstock

To purchase this product online please click here

Tip

Thursday, April 16, 2009

227- Beach Card


This was cased from this fantastic card card by Michelle Zindorf. I am still practising with the brayer and sponging- her tutorials are just so amazing. I can't wait to do more!

Recipe:

Stamp Sets: Cheers to You, Embrace Life

Ink: Tempting Turquoise, brilliant blue, always artichoke, old olive, creamy caramel, close to cocoa, chocolate chip, real red, perfect plum, yoyo yellow, pumpkin pie

Paper: Whisper white, tempting turquoise, brilliant blue, always artichoke DSP

Accessories: photo corners punch, brayer, sponges, markers, white gel pen, clear embossing, versamarker

Wednesday, April 15, 2009

Who Rocks? Julie Rocks!!

I got home tonight to an email that truly made my day. Stampin' Up! sent me an email saying I got my first online order! So exciting! I love online orders! Yes, yes it was from my best friend but still- very exciting!!

For any of you who are in need of some amazing Stampin' Up! products why don't you click on the link on the right and place an online order? Not only will you get fantastic products AND a free catalogue you will also get a specially designed Thank You card from yours truly! I mean isn't that the best deal ever?! hehe

226- Wedding Cake Card


I have seen many cards on splitcoast that inspired this cake. It was a great excuse to break out my pretties kit- I can't believe I haven't used anything in it yet! It is hard to see here but I used my background texturz plates on the white pieces to add some texture to the card. I love the finished product- I think it is very elegant and chic

Recipe:

Paper: Whisper White, Silver

Accessories: Pretties kit, 1/4" basic grey taffeta ribbon, corner rounder, big shot, background plate

Tuesday, April 14, 2009

225- Reflection Card


This card is another case from Michelle Zindorf. I am sure you will see many more- I am using the tutorials on her amazing website to practice my brayer and sponge skills. I made a few changes because I did not have the stamps that she used. All and all I am very happy with it but I still need a lot more practice with my brayer. A few quick things that I learned from this

1- Be careful with the sponge. I cut my Stampin' Up! sponge into 4 pices but it was still quite rounder and it made my reflection quite large. I would just use the cut edge next time to make sure it was smaller and more precise

2- I need more markers!! I used a blender pen and while it was helpful I was unable to get the crisp lines that she did

3- A white gel pen is one of the most useful tools when making these types of cards. She uses them all the time for highlighting and they are really effective

Recipe:

Stamps: Lovely as a Tree, Artfully Asian

Ink: Bashful blue, lovely lilac, garden green, old olive, kiwi kiss, close to cocoa, basic grey

Paper: Whisper white, old olive, bashful blue

Accessories: brayer, sponge, brads, brad punch, markers, blender pen

Monday, April 13, 2009

224- Rose Sympathy Card


I made this card for my grandmother because her brother recently passed away. I wanted to keep it very simple and clean and elegant. I also used a rose because her name is Rosina (got the idea from Becca). My instinct is always to add glitter and embellishments but I didn't think it would be appropriate on a sympathy card. I cut out the tops of the roses and popped them up for some more dimension

Recipe:

Stamps: Embrace Life, Close as a Memory

Paper: Whisper white, pink pirouette, old olive, Parisian Summer DSP

Ink: Pink Pirouette, Old olive

Accessories: 5/8" old olive grosgrain ribbon, corner rounder, slot punch

Sunday, April 12, 2009

Tip of the Week

My tip of the week is associated with the card that I just posted. We learned that you should ground all images that are stamped on neutral cardstock so that they don't look like they are just floating. You just use your blender pen or aqua painter or a sponge to put some colour at the base. I really recommend doing this- it really makes a difference. I just did it for the first time and love how it turned out.

223- Happy Bird Day!


I wanted to combine the colour (CC213) and layout challenges (SC223) this week. I haven't used Pun Fun in a while and thought this was a great card to use it on.

I learned at the Regional Convention that you should ground your images that are just placed on neutral paper. You need to just blender pen on some colour at the base of the image to ground it so it doesn't look like it is just floating. This is the first time that I've tried this and am really happy with how it turned out.

Recipe:

Stamps: Pun fun

Paper: close to cocoa, Bashful Blue DSP, Parisian Summer DSP

Ink: Close to cocoa, bashful blue, so saffron

Accessories: Blender pen, 5/8" so saffron grosgrain ribbon, brads, brad punch

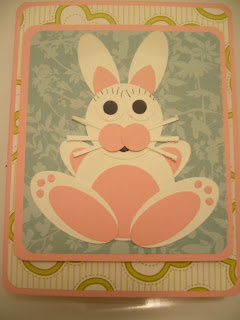
Happy Easter!


I just wanted to bring back my Bella Bunny to wish you all Happy Easter!!

Saturday, April 11, 2009

222- Mother's Day Flower Pot


To me this technique challenge (TLC215) was perfect for mother's day cards. It was also a great excuse to use my big shot. I did the basket the same way I made it on my easter card- with the sanded background. I just love the texture effect that it gives. I also used Sticky Strip to attach the flowers so that they could stay on without being fully adhered to the insert because you want it to be able to go over the basket. Here is the link to the instructions for this technique

Recipe:

Stamps: All holidays, Sanded

Paper: So saffron, regal rose, rose red, taken with teal

Ink: Taken with teal

Accessories: Big shot, flower layers, tab punch, scallop edge punch, 5/8" regal rose grosgrain ribbon, sticky strip, natural hemp twine

221- Sweetest Pleat Card


I have been wanting to try this technique for a while and thought that my new Raspberry Tart paper would be perfect. It is an older technique challenge on splitcoast (TLC205. I also wanted to make a card using only accessories and no stamps.

To make the pleats I scored alternating between 1" and 0.5" scores. I then used sticky strip to attach it to the card just to make sure it stayed attached. I adhered the beads to the embosslits I used crystal effects.

Recipe:

Paper: Whisper white, rose red, raspberry tart DSP

Accessories: Big shot, sweetest stem embosslit, crystal effects, silver beads, 1/4" whisper white taffeta ribbon, sticky strip

Friday, April 10, 2009

Pop Up Dies


I can't even begin to express how fantastic these dies are! They are the new Sizzix dies for the Big Shot that are being sold exclusively by Stampin Up and they are just so much fun! I cannot wait to start playing with them! There is the cake pop up and the ball pop up and both can now be ordered for $47.95 either directly through me or by clicking here

One of my favorite blogs www.stampwithheather.com has been making the most amazing cards with these dies including a pirate ship- how cute is that?! I wish I was that creative!

Sunday, April 5, 2009

Tip of the Week

Layers!! Layers layers layers!! I can't overemphasize the importance of layers in your stamping! It is really the way to distinguish between a beginner card and a polished card. Adding layers really does finish off all of your projects and brings them to that next level. The general rule is at least 3 layers on your card. Especially if you are emphasizing a certain stamp layer with the same colours of ink that you are using.

220- Nursery Card


I saw this card on splitcoast almost a year ago and just thought it was the cutest thing ever. I didn't have a crimper or the stamp set though to make it. Everything fell into place though this weekend and I was able to make it- I mean how cute is that?!!? Kudos to inkydigits for one of the most creative cards I have ever seen! I just had to case it!

Recipe:

Stamp Set: By ones and by twos, Sweet Stars wheel, Duckie Wheel

Ink: Bashful blue, barely banana, apricol appeal

Paper: Pretty in Pink, Barely Banana, Whisper white

Accessories: Crimper, rose red brads, blender pen, small and large oval punches, 1/4" pretty in pink taffeta ribbon

Saturday, April 4, 2009

219- Kindred Mother's Day Card


I made this at my stamp club today with my Rachel's Kindred Spirits set for the colour and layout challenges this week. That is my favourite thing about stamp club- I get to use new stamp sets that I don't own! I love the colours- I can't believe that I only have a few months left with the in colours! I still need some practice making perfect corners with the scallop edge punch but I'm working on it

Recipe:

Stamps: Kindred spirits, all holidays

Paper: Riding Hood red, pink pirouette, chocolate chip

Ink: Riding hood red, chocolate chip, pink pirouette

Accessories: Scallop edge punch, corner rounder

Friday, April 3, 2009

Big News For My Downline

I just went to see a direct sales motivational speaker on leadership and let me tell you- I'm motivated! I have come home with a ton of ideas! Look for a big announcement on Sunday- I just wanted to build up some anticipation!

To those of you who aren't in my downline- you should come join us! Right now is a fantastic time to join as Stampin Up is offering a great payment plan promotion. You can pay 3 equal installments over the next 3 months to get your kit or you can order the whole kit at once- whatever is better for you. This is a fantastic way to either pay for your habit and even earn some extra income. The average workshop will earn you $200- who couldn't use that.

And to sweeten the deal I will throw in a punch of your choice as a thank you. For more information please email me

And to my downline- all will be unveiled on Sunday

218- Lady Bug Card


As soon as I saw this cute love bug card I knew that I wanted to make a version for my big shot class

Recipe:

Stamps: Polka Dot

Paper: Basic Black, Real Red

Ink: Basic Black

Accessories: Big shot, clear circle die, dazzling diamonds, 1 3/8" circle punch, 1/4" circle punch, brad punch, brad

Thursday, April 2, 2009

217- Sweetest Stem Genie Bag


This is a genie bag that we made in my big shot class the other night. I think they are just adorable and perfect for little loot bags

Recipe:

Paper: Perfect plum DSP, perfect plum, whisper white, regal rose

Accessories: Big shot, top note die, sweetest stem embosslit, corner rounder, dazzling diamonds, cropodile, 5/8" regal rose grosgrain ribbon, cellophane bags, sticky strip

Wednesday, April 1, 2009

April Newsletter

Hi everyone,

Spring is here and with it comes quite a few events to stamp for! Easter, Mother's Day, Father's Day, weddings- such a great excuse to stamp!! As always I'm writing to let you know about some Stampin' Up promotions and events that I have coming up.

First off, I have quite a few classes coming up:

STAMP A STACK- If you are around Easter weekend I am planning a stamp a stack on Saturday, April 11th. There is a twist to this stamp a stack- it is a Mother's Day stamp a stack. You will be making a gift for your mom- 6 coordinating cards with a matching box to put them in. You will also make a Mother's Day card to go with the gift. The cost of this class will be $25 and this includes all of the envelopes that you will need. Please RSVP by April 8th

CHALK CLASS- I know a lot of you recently got chalks and are unsure how to use them. I will be holding a class where we will be doing 3 cards using various methods and techniques of applying the chalks. If you are interested and already have the chalks the cost of the class will either be $15 or $30.95 worth of product (before tax and shipping). If you do not have the chalks, the cost of the class will either be $15 or you will have to order the chalks ($30.95). I will be holding two classes- one will be at 6pm on Thursday April 16th in Downtown Toronto and the other will be on Sunday April 19th at 1pm at my place. Please RSVP by April 6th

REINKERS CLASS- In this class we will be making 3 cards using techniques involving reinkers. Remember all ink pads and markers are refillable and we sell the ink refills for these. These little reinkers are what we will be using. The cost of the class will be $16- you will get to choose two colours of ink refills from any of the colour families and also a gold or silver one (pg. 190). Once again I will be holding two classes- one on Thursday May 7th at 6pm and the other on Saturday May 9th at 1pm. Please RSVP by April 27th

BIG SHOT CLASS- The third big shot class will be held at the end of this month and let me tell you it is going to be fantastic. We are going to be using various materials in our projects and one little hint- Pop-up!!

Please email me to RSVP. My classes are always posted on my demonstrator website so you can see what is going on.


There is a new Mini Occasions catalogue!! Yay!! I am ALL over the accessories in this catalogue- they are just fantastic. Stampin' Up! is offering a fantastic promotion with this right now- it is called the Get Connected promotion. For every $50 that you spend on products from this catalogue you will get receive one free product from the under $12 page at the very back of the catalogue (pg. 208). How fantastic is that?! Here is the link to the catalogue:

http://www.stampinup.com/ca/documents/Occasions09_CA.pdf


If you are looking to stock up on stamping tools there is one really great way to do it- host a party!! All you need to do is get at least 3 friends together for a super fun night/day of stamping and I'll do the rest. For $15 each your friends will be able to make 3 projects and leave with the satisfaction that they made those beautiful cards! As a hostess you will receive a free catalogue, the class fee will be waived and you will receive a free stamp set as a thank you from me! Plus I always like to throw in little treats at the party!


Stampin' Up! just announced that it will be offering the starter kit on a 3 month payment plan until April 30th- how amazing is that?!!? You will pay in three equal payments but receive all of your products right away so you can get started with your business. If you are interested in this please email me because you can't sign up through my demonstrator website- I need to send in some forms. As always if you join my team I will give you a punch as a thank you! So far I have a fantastic group of ladies on my team and I'd love for you to join us!


As always you can place orders morning, noon and night using the online ordering system on my demonstrator website. For every $100 order that you place you will receive a free catalogue

http://www.stampinup.com/ECWeb/default.aspx


For every $25 that you spend on product (before tax and ship) you will be able to pick a square on a card with 25 squares. Once the whole card is filled I will draw a number and the winner will receive a $25 gift certificate for Stampin' Up! products from me!

http://shaunacards.blogspot.com/2009/03/pick-number-any-number.html

Happy Stamping Everyone!!
Shauna

216- Top Note Picture Frame


I got this idea at my team's megameeting in January. Karen Kane demonstrated how to make these frames with chipboard and I knew right away that I wanted to do these in my big shot class. It's a great way of using up your retired DSP. Helpful hint- make sure to put the underside of the frame on top of the die because there will be imprints from the sides of the die that you don't want on the top

On the back I put a piece of chocolate chip paper that is the size of the frame. I put sticky strip along three sides but not the top. This allows you to put your picture in. I made this a stand up frame. I took a piece of cardboard and cut it to 2"x4", scored it at 1" along the long part and then used sticky strip on the top part to adhere to frame. I just used the piece of cardboard that packaged the big shot die.

Recipe:

Paper: Summer Picnic DSP, chocolate chip

Accessories: Big shot, top note die, flower layers die, build a brad, 1/2" circle punch, sticky strip